PageViews Last Month

Monday 28 September 2015

Fixing MSI errors during patching


Patching is an activity that is frequently performed by DBA’s. It is the responsibility of a DBA to keep the SQL servers up and running all times and ensure the  Cumulative Updates, Service Packs, out of band hot-fixes are applied to the instances.It’s hardly a 30 min task if it involves a cluster. Procedure is simple download the patch, extract the files and run it on the nodes (passive first) and bounce the services back to active node. 

However every once in a while it’s good to come across some errors and get in the tight spot of now what? Take a look at the below error.


As the error states a possible Windows Installer database file (.msi) or the Windows Installer patch file (.msp) is missing from the Windows Installer cache. This normally occurs when the setup is stopped mid-way or due to file corruptions. Below is an amazing support link by Microsoft which explains the cause and resolution for the above error. It also provides a vb script FindSQLInstalls.vbs that helps find the missing .msi and .msp files. 

Step 1: Follow the Microsoft support link


When the script is run with admin privileges the log generated directs from where to copy the missing files (SourceFolder) and where to place them (Destination Folder). The <RootDrive> is location from where the setup was run or the patch files exists. They could be on different drives as well. If you observe carefully the folder <SQL Server **** DO_NO_DELETE> gets created on new installation to the respective drive.

Most of the times the source folder will look as follows

Source Folder :(RootDrive)\x64\setup\


Source Folder :(RootDrive)\1033_ENU_LP\x64\setup\


Destination folder - C:\Windows\Installer


In the scenario that was encountered the files were missing even at the path mentioned by the log generated with FindSQLInstalls.vbs for source locations. So what next ?

Step 2: Try uninstall –re-install


Well now that we don’t have the files mentioned at the source location we look through search option. After searching for the files on the local machine on all other drives as well we fail to find them. So now we are stuck. Next option at hand is uninstall-re-install. Obviously take the mandate backups of databases system as well as users. Take backups of reporting servers if configured. Back up any other files which will be cleared during uninstall. When trying to uninstall SQL server we get the below error.


Step 3: Uninstall each SQL components from add or remove programs under control panel.

Well it doesn’t get easy does it? But have to fix it so we try this and again we get an error.


At this point of time we created a new folder with a clean copy of setup files and point the browser to the new location with the new setup files it still would not take the path.


Step 4: Do not panic and do not try this on production servers.

Almost about to give up after this error when we do what we are not supposed to do. If you have read above Microsoft link carefully it clearly states missing files cannot be copied between computers, because they are unique. We still proceeded with trying to cheat the computer and copied those files from a different server. 


Warning: Never try this on production servers. Be prepared for an instance crash as well.

End result: Corruption of files under C:\windows\installer directory.


Step 5: Undo step 4

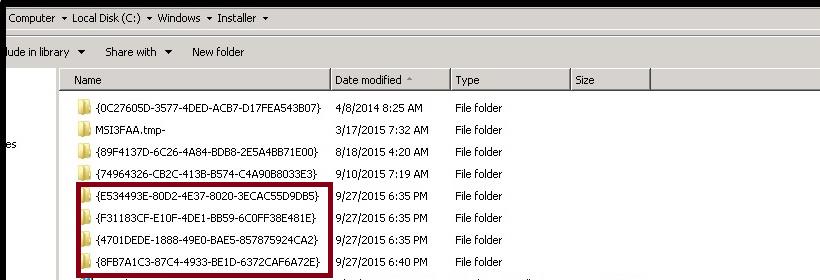
Thankfully we had made a note of which files were copied & where the files were copied from one computer to another and deleted them. Not knowing that the system was smart enough to understand we tried to cheat it. It had also created some files of its own under C:\Windows\Installer directory.


So now we are back at step 3 with even more corruption.

Step 6: Look up registry commands

Desparate to fix this I try to uninstall the instance again. Get the below error


Since we corrupted the files this time it did not tell us which files were skipped or missed the setup just shut down with the above message. At this point of time I was able to look up Aaron Bertrands blogs for uninstallation instruction for SQL server evaluation edition.


Prior to executing any of the below step I recommend one to go through these links as well


Now we proceed to lookup the registry mentioned in Aaron's blog to locate  all of the SQL server -related GUIDs 

HKEY_LOCAL_MACHINE\SOFTWARE\Microsoft\Windows\CurrentVersion\Uninstall\


We go through each folder, note down the display name and uninstall string msiexec.exe command for all SQL related GUID's.

Step 7: Fix the components with registry

In Aaron blogs he wanted to uninstall the instance. We on the other hand are just trying to patch the existing one which we managed to corrupt further. So let’s fix what we broke. We have already copied the clean setup files in the root drive. 


We do not run the setup just extract all the files. Next we run the misexec.exe command for each component. Again it throws me the windows installer error.


We click on OK to see which file its asking for ? Next we go to the new setup files location where we have our setup files extracted. This time it agrees to take the path and we hit OK.


This time it installs the feature successfully and creates the GUID files under C:\Windows\Installer as well.


Step 8 : Try to run the patch again.

Now that we have fixed all the individual components we have all the files required by windows installer for upgrade.Hence we proceed with running the patch once again. This time we are able to do it successfully.


Mission accomplished & a lesson well learnt ........ 


Sunday 27 September 2015

Table partitioning

What is partitioning.

To start with partition is the feature provided by SQL server in which very large tables are split between multiple files and file-groups for ease of access and faster retrieval/ update purposes.
Consider a table which consists of millions of records. When we insert all the records in one table, in one file; retrieval or update time for any of the record even if it involves index seek is considerably high. A better option would be to split the table based on certain column values. Let the data be spread across multiple file-groups.

When a search condition is encountered comprising on that column value SQL server will now have to look at smaller chunks of data of any one of those multiple files, thus resulting faster retrieval and execution time.

How to create partitions


Step 1: Create File Groups

Obviously we shall first begin with creating different file groups and allocating files to each group. This can be done from the management studio as follows under the Database Property-> Filegroups Sectio


Step 2: Assign files to these groups

Next step is creating files and assigning them to these groups. We may assign multiple files to one file group. SQL server will use proportional fill algorithm when data is inserted into these files.Below image depicts one file assigned to each groups.


If you love coding below is the T-SQL for the same

USE [master]
GO
ALTER DATABASE [test] ADD FILEGROUP [F1]
GO
ALTER DATABASE [test] ADD FILE ( NAME = N'Test1', FILENAME = N'c:\Program Files\Microsoft SQL Server\MSSQL11.SQL\MSSQL\DATA\Test1.ndf' , SIZE = 5120KB , FILEGROWTH = 10%) TO FILEGROUP [F1]
GO
ALTER DATABASE [test] ADD FILEGROUP [F2]
GO
ALTER DATABASE [test] ADD FILE ( NAME = N'Test2', FILENAME = N'c:\Program Files\Microsoft SQL Server\MSSQL11.SQL\MSSQL\DATA\Test2.ndf' , SIZE = 5120KB , FILEGROWTH = 10%) TO FILEGROUP [F2]
GO
ALTER DATABASE [test] ADD FILEGROUP [F3]
GO
ALTER DATABASE [test] ADD FILE ( NAME = N'Test3', FILENAME = N'c:\Program Files\Microsoft SQL Server\MSSQL11.SQL\MSSQL\DATA\Test3.ndf' , SIZE = 5120KB , FILEGROWTH = 10%) TO FILEGROUP [F3]
GO
ALTER DATABASE [test] ADD FILEGROUP [F4]
GO
ALTER DATABASE [test] ADD FILE ( NAME = N'Test4', FILENAME = N'c:\Program Files\Microsoft SQL Server\MSSQL11.SQL\MSSQL\DATA\Test4.ndf' , SIZE = 5120KB , FILEGROWTH = 10%) TO FILEGROUP [F4]
GO


Step 3: Deciding the column for partition

Next step is for us to decide the criteria on which data will be partitioned. Ideally tables that contain historic data are partitioned. In our example we will be implementing this for similar OrderDetail Table. Data will be partitioned based on OrderDate. Structure is as follows.


Step 4: Creating Partition Function

First we shall create decide the ranges which is defined by the partition function
In our case the function will be as below


CREATE PARTITION FUNCTION [OrderDatesMonthly] (datetime)
AS RANGE LEFT FOR VALUES ('20150401','20150701','20151001');


Since we have specified 11 values our total number of partitions will be 3+1 =4.


Partition
Values

1
date<=20150401
<= 1st April 2015
2
date<=20150701
<=  1st July 2015
3
date<=20151001
<= 1st October 2015
4
date>20151201
> 1st October 2015

I’ve used the RANGE LEFT option here. One may also choose to opt for RANGE RIGHT. For example


CREATE PARTITION FUNCTION [OrderDatesMonthly] (datetime)
AS RANGE RIGHT FOR VALUES ('20150330','20150630','20150930');


Step 5 : Creating Partition Scheme

Now that we’ve split the range lets map it to different filegroups. Ranges are split with functions. Split ranges are mapped with schemes. In our case the scheme will be

CREATE PARTITION SCHEME [OrderDatesMonthlyScheme] 
AS PARTITION [OrderDatesMonthly] TO (F1, F2, F3, F4);


Step 6: Breaking the table

Our range is set our file-groups are mapped so now let’s break our tables into smaller manageable chunks.
     
CREATE TABLE dbo.[OrderTable](
[OrderId] [nchar](10) NOT NULL,
[OrderDate] [smalldatetime] NOT NULL,
 CONSTRAINT [PK_OrderTable] PRIMARY KEY CLUSTERED
(
       [OrderId] ASC
)
) ON OrderDatesMonthlyScheme(OrderDate)

GO

In just 6 steps we saw how too break large tables into partition tables.
In the coming blogs we will learn how to move data between such tables.

Saturday 12 September 2015

MOVING SYSTEM DATABASES

Below document provides information that can be used for moving system database. However this is not recommended for database installation its ideal for troubleshooting & disaster recovery purposes alone.

A: Moving System Database Files (Model, msdb, Tempdb) 


Step 1: Run the following in a new query window

USE master
Go

ALTER DATABASE model
   MODIFY FILE ( NAME = 'modeldev' , FILENAME =
'F:\MSSQL\Data\model.mdf' );
Go
ALTER DATABASE model
    MODIFY FILE ( NAME = 'modellog' , FILENAME = 'F:\MSSQL\Data\modellog.ldf' );
Go

ALTER DATABASE msdb
    MODIFY FILE ( NAME = 'MSDBData' , FILENAME = 'F:\MSSQL\Data\MSDBData.mdf' );
Go
ALTER DATABASE msdb
    MODIFY FILE ( NAME = 'MSDBLog' , FILENAME =
 'F:\MSSQL\Data\MSDBLog.ldf' );
Go

ALTER DATABASE tempdb
               MODIFY FILE ( NAME = 'tempdev' , FILENAME = 'F:\MSSQL\Data\tempdb.ldf' );
Go
ALTER DATABASE tempdb
               MODIFY FILE ( NAME = 'templog' , FILENAME = 'F:\MSSQL\Data\templog.ldf' );
Go


Step 2: Stop the SQL server instance. Now move the files to the location specified

Step 3: Restart the SQL server instance


B: Moving master database 


Step 1:    On the Start menu, point to All Programs | Microsoft SQL Server 2008 R2 | Configuration Tools | SQL Server Configuration Manager.

Step 2 :  In the SQL Server Services node, right-click the instance of SQL Server (for example, ) and choose Properties.

Step 3 : In the SQL Server (instance_name) Properties dialog box, click the Advanced tab.
Step 4: Edit the Startup Parameters values to point to the planned location for the master database data and log files, and click OK. Moving the error log file is optional.


The parameter value for the data file must follow the -d parameter and the value for the log file must follow the -l parameter. The following example shows the parameter values for the default location of the master data and log files.


-dC:\Program Files\Microsoft SQL Server\MSSQL10_50.MSSQLSERVER\MSSQL\DATA\master.mdf;
-eC:\Program Files\Microsoft SQL Server\MSSQL10_50.MSSQLSERVER\MSSQL\LOG\ERRORLOG;
-lC:\Program Files\Microsoft SQL Server\MSSQL10_50.MSSQLSERVER\MSSQL\DATA\mastlog.ldf

 If the planned relocation for the master data and log file is F:\MSSQL\Data, the parameter values would be  changed as follows:


-dF:\MSSQL\Data\master.mdf;
-eC:\Program Files\Microsoft SQL Server\MSSQL10_50.MSSQLSERVER\MSSQL\LOG\ERRORLOG;
-lF:\MSSQL\Data\mastlog.ldf

Step 5: Stop the instance of SQL Server.


[SQLPROD1] C:\> net stop SQLSERVERAGENT
[SQLPROD1] C:\> net stop MSSQLSERVER

Step 6: Move the master.mdf and mastlog.ldf files to the new location.


[SQLPROD1] C:\> move "C:\Program Files\Microsoft SQL Server\MSSQL10_50.MSSQLSERVER\MSSQL\DATA\master.mdf" F:\MSSQL\Data\
        1 file(s) moved.

[SQLPROD1] C:\> move "C:\Program Files\Microsoft SQL Server\MSSQL10_50.MSSQLSERVER\MSSQL\DATA\mastlog.ldf" F:\MSSQL\Data\
        1 file(s) moved.


Step 7: Restart the instance of SQL Server.


[SQLPROD1] C:\> net start MSSQLSERVER
[SQLPROD1] C:\> net start SQLSERVERAGENT

Step 8: Verify the file change for the master database by running the following query.


USE master
Go

SELECT
    name                  AS "Logical File Name"
  , physical_name         AS "Physical File Location"
  , state_desc            AS "State"
FROM
    sys.master_files
WHERE
    database_id = DB_ID(N'master');
Go

Logical File Name   Physical File Location            State
------------------- --------------------------------- --------
master              F:\MSSQL\Data\master.mdf          ONLINE
mastlog             F:\MSSQL\Data\mastlog.ldf         ONLINE

C: Moving Resource Database 


Starting SQL server 2005 Resource Database was instroduced as a read-only database that contained all the system objects that are included within SQL Server. It does not contain user data or user meta data.
Ideally it is found in the below directory for default installation of SQL server on C:\ drive
C:\Program Files (x86)\Microsoft SQL Server\MSSQL10.<instance name>\MSSQL\Binn

The filenames would be mssqlsystemresource.mdf and mssqlsystemresource.ldf respectively.
In SQL Server 2008 and higher, the Resource database resides under the following directory and cannot be changed:


SQL Server 2008
<drive>:\Program Files(x86)\Microsoft SQL Server\MSSQL10.<instance_name>\MSSQL\Binn\

SQL Server 2008 R2
<drive>:\Program Files(x86)\Microsoft SQL Server\MSSQL10_50.<instance_name>\MSSQL\Binn\

SQL Server 2012
<drive>:\Program Files(x86)\Microsoft SQL Server\MSSQL11.<instance_name>\MSSQL\Binn\


The location of these files are dependent on which version of SQL Server you are running (as explained in this section). Each instance of SQL Server will have its own resource database mdf and ldf files.

Msdb, tempdb, model & master are moved. Now we shall move the resource database. 

For this we will need to know a few trace flags

The resource database is used by the engine to collect information of system objects during an upgrade.

In SQL Server 2005, if you moved the master database, you had to also move the Resource database to the same location as the master data file. In SQL Server 2008 and higher, the location of the Resource database cannot be moved from its default location.


Option
Impact
Trace Flag 3607
Starts SQL Server without recovering any databases. Skips automatic recovery (at startup) for all databases.
Trace Flag 3608
Starts SQL Server, recovering master only. Skips automatic recovery (at startup) for all databases except the master database.
Trace Flag 3609
Skips the creation of the tempdb database at startup. Use this trace flag if the tempdb database is problematic or problems exist in the model database.
User Database Status -32768
Starts SQL Server without recovering the user database

When SQL server starts it goes through the recovery phase for each of its database. Reads the error logs and perform the redo and undo actions based on the LSN. First the master database is opened and recovered. Next the model database. Depending on model the tempdb database is created and then the rest of the databases are started and recovered.


Hence when we are moving the resource database we will make use of trace flag 3608.I have also used trace flag 3607 however it’s not mandate to do the same.Put the SQL server in single user mode & connect with the sysadmin account with the startup options -c, -m

Step 1:

  Command: SQLCMD –U <username> -P <password> -c –m –t3607 –t3608.

Step 2:

Then we issue the below command to move resource database

USE master
GO

ALTER DATABASE  mssqlsystemresource
MODIFY FILE  (NAME = dataFILENAME = N' F:\MSSQL\Log\mssqlsystemresource.mdf' );
GO

ALTER DATABASE  mssqlsystemresource
MODIFY FILE  (NAME = log, FILENAME  = N' F:\MSSQL\Data\ mssqlsystemresource.ldf' );
GO

Step 3: Stop the SQL server instance. Now move the files to the location specified

Step 4: Restart the SQL server instance.


D: The database information mapping between SQL Server 2000 and 2005


ID
Information
SQL Server 2000
SQL Server 2005
1
Database system table\view - Source for all databases on the SQL Server to include the name, owner, creation date, etc.
SELECT *
FROM master.dbo.sysdatabasesGO
SELECT *
FROM sys.databases;GO
2
Database files system table\view - Source for the currently connected database's file names, size, location, type (database or log), etc.
SELECT *
FROM dbo.sysfilesGO
SELECT *
FROM sys.database_files;GO
3
Database files system table\view - Source for all database's file related information
SELECT *
FROM master.dbo.sysaltfilesGO
SELECT *
FROM sys.master_files;GO
4
IO statistics on database files - Returns the usage statistics on a per file basis
-- Single database file
SELECT *FROM :: fn_virtualfilestats(1, 1)GO
-- All database files
SELECT *FROM sys.dm_io_virtual_file_stats(NULL, NULL);GO
5
Database meta data - Returns the pertinent database name, size and remarks
EXEC master.dbo.sp_databases
GO
EXEC master.dbo.sp_databases;
GO
6
Database meta data - Fairly complete set of pertinent database information that can return data for all databases or 1 database
-- All databases
EXEC master.dbo.sp_helpdbGO
-- Single databaseEXEC master.dbo.sp_helpdb 'Northwind'GO
-- All databases
EXEC master.dbo.sp_helpdb;GO
EXEC master.dbo.sp_helpdb 'AdventureWorks';
GO
-- Single database
7
Change database ownership - System stored procedure to change the database owner
EXEC sp_changedbowner sa
GO
EXEC sp_changedbowner sa;
GO
8
Database ID to name translation - System function that will provide the database name when passed the database ID from the database system table
-- Returns the master database
SELECT DB_NAME(1)GO
-- Returns the master database
SELECT DB_NAME(1);GO
9
Database name to ID translation - System function that will provide the database ID when passed the database name from the database system table
-- Returns 1
SELECT DB_ID('master')GO
-- Returns 1
SELECT DB_ID('master');GO
10
Database status - System function that will return the value for 1 of ~25 database specific values
SELECT DATABASEPROPERTYEX('master', 'Status')
GO
SELECT DATABASEPROPERTYEX('master', 'Status');
GO


References were taken from below sources

https://msdn.microsoft.com/en-us/library/ms345408(v=sql.105).aspx
http://www.madeiradata.com/moving-system-databases/
http://www.sqlservercentral.com/articles/Administration/movingsystemdatabasesachecklist/1608/